Onward and Upward! Goals for 2015

sunset2015 is definitely starting off with a bang! Not only is it so cold that the boss has us working from home (the real feel was -24 when I woke up this morning…), but I’m enrolled in a couple graduate classes this quarter that are bound to keep me busy, and I’m doing a juice cleanse that has me craving – of all things – deli sandwiches, something I rarely eat anyway. Luckily, the cleanse ends tomorrow, but the other two will be sticking around for awhile.

What else do I have planned for 2015? Well, not much at this point, but I’ve put together some goals. I managed to tackled all of the items on the 2014 list, though the storage area is kind of a mess again and could use some TLC…

Lately I’ve been thinking about things I should cross off my bucket list before I turn 30 in 2016. I’ll try to keep the goals for 2015 and the holy-crap-I’m-almost-30 list separate, but some of these are probably a bit of both (and if you have suggestions for me, please send them along!).

1. Return to regularly scheduled programming. I was doing so well there for awhile, posting to Urban Nesting about four times a week, but lately I feel like my life has been so scattered, and I haven’t devoted the time to UN that I really should. I want to get back to contributing on a regular basis again. Let’s get to 200 followers! (We’re at 196 right now, for the record.)

2. Especially Foodie Fridays. Last year I blamed marathon training and I’m sure this year I’ll blame class (and maybe dating), but I’d really like to try a new recipe each week and share my findings with y’all on Fridays. Here’s to more culinary adventures in 2015! Nobody is going to make me a better cook but me.

3. Carve out an office space in my apartment. My coat closet is prime territory for this, but I’m not sure I can devote all that space to a desk. At the very least I’d like to set up some kind of landing strip to put mail and paperwork because last month’s gas bill may have gotten misplaced…

4. Transform my bedroom into a cozy retreat. I’ve definitely ignored my bedroom in lieu of rooms that are more public, but when it comes down to it, how many days a year am I entertaining versus home by myself? I should do something for me! The bedroom design is kind of all over the place right now, so it’ll definitely take some work. I’ll keep in mind Mitchell Gold and Bob Williams’ advice. (First project: Buy an alarm clock and move my phone away from the bed!)

5. Take a big trip. I know “travel more” was on the list last year, and I feel like I did do a few smaller trips that fulfilled that requirement (and we’re totally fun!). But I’m finally starting to feel like an adult with a real job and real PTO time and a (somewhat) real budget to take real vacations. It’s been awhile since I’ve been out of the country (minus Mexico). I think it’s time.

6. Ride my bike – or a bike – more often. Do you know how many times I rode my bike in 2014? Zero. I didn’t even get it out of the basement storage. If I’m too lazy to maintain it, I can get a Divvy bike sharing membership for something like $50/year. That’s just stupid cheap. I realize it’s not possible in the tundra, but I definitely want to keep this goal in mind for spring.

Sure, there’s some smaller things floating around in my head (have to get rid of those grubby kitchen rugs!), but these are the big picture items for 2015. What’s on your to-do list this year?

Aside

I Want That Wednesday: Bell Flush Mount Lamp

Why do rental apartments always have such terrible lighting fixtures? Well, I mean, I guess it’s because they probably buy the cheapest thing in bulk for all their units/buildings whether it’s hideous or not and never replace it. Maybe I’d have a bit more sympathy if I was the landlord, but I’m the tenant who has to look at these ugly ass “crystal” or “smoked glass” (some quite literally, like someone put too hot a bulb in there at some point) flush mount fixtures in my entry, kitchen, bedroom, etc.

I took it upon myself to swap out the light in the dining room (the perks of having an electrician as a father!). It’s almost definitely against the terms of my lease, but it makes such a huge difference. That’s a pendant light though, so it was much easier to find an appropriate replacement.

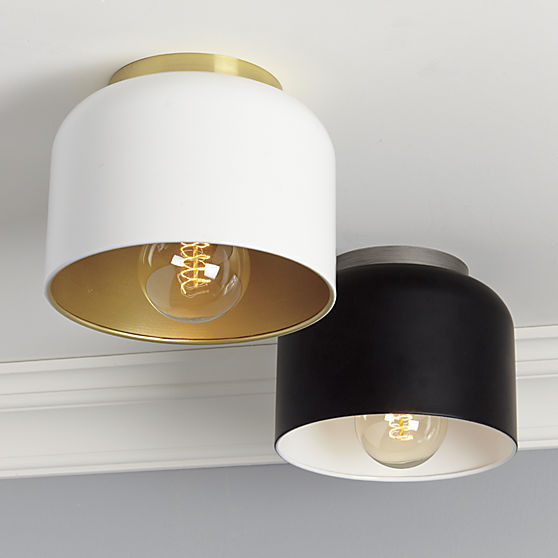
But as I prepare to paint my kitchen this weekend (it desperately needs it!), I keep looking at the two crappy flush mount fixtures and wondering if there’s any stylish alternatives out there. Enter CB2’s Bell Flush Mount Lamps:

bell-white-flush-mount-lamp

I’ll let the description speak for itself:

minimal to the max. Oversized bell beams modern in a sculptural two-tone design by Studio 1A.M. Based in Chicago and Los Angeles, the designers were “inspired by organic and vintage-modern designs that achieve a soft but minimal and versatile aesthetic.” Bright white painted steel shade lights up overhead or on the wall with brass-painted interior that amplifies the glow. Light up the room with our cut-glass or vintage-style filament bulbs.

Gimme, gimme, gimme!

Bell Flush Mount Lamps, $60, CB2

(Image: CB2)

Disclaimer: “I Want That Wednesdays” are a series of posts that, well frankly, are just of things (decor, fashion, food, etc.) I like. The products featured are never sponsored; they’re simply items I’ve come across that I’m crushing on and that I thought you might enjoy as well. Let me know if you love it/ hate it/ can’t get enough of it.

Image

A New Oven, But…

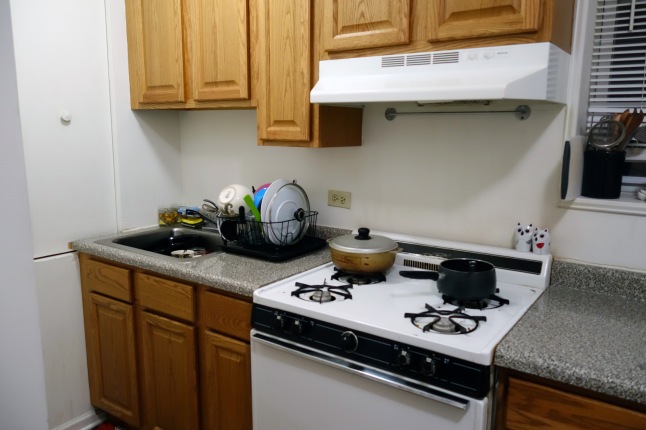
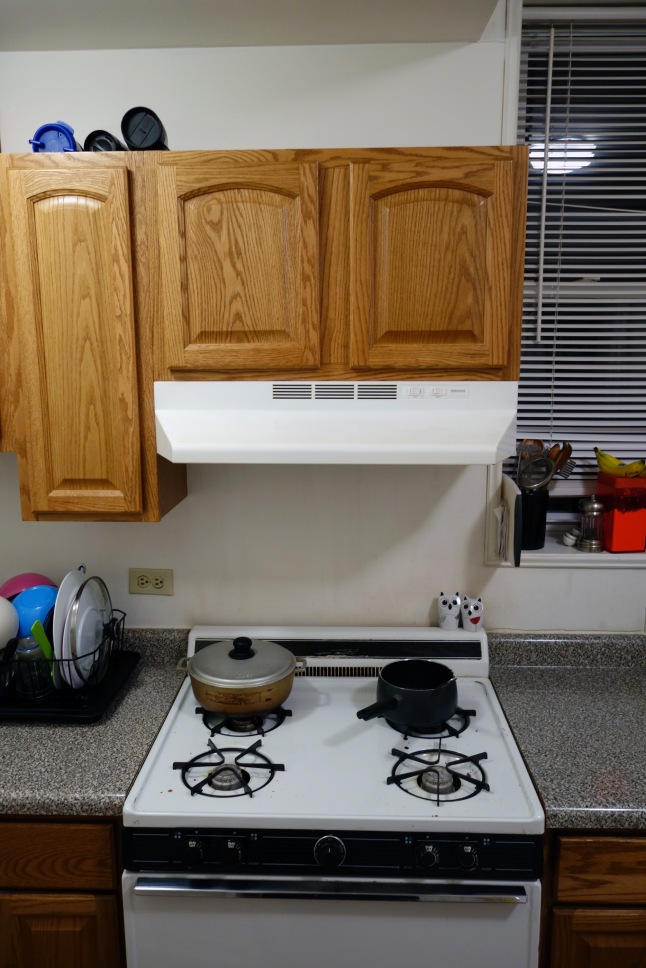
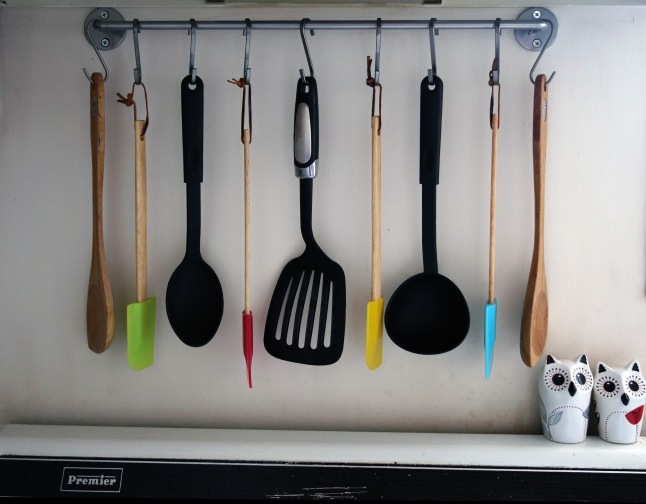
Also, a new design problem. Can you spot it?

If I push the new oven all the way back, the utensil rack is too long! Womp womp.

I’m thrilled to have a new oven, even if it is the economy model. Who needs a timer? Pssh. But I’m not thrilled that the management company didn’t bother to paint over the smoke damage on the wall from the piece-of-crap oven that was there before—and probably had been since 1983!

Looks like I have a couple kitchen projects ahead of me…

Finally! Living Room Reveal

I know I teased the new living room rug more than two weeks ago now… I’m sorry to leave you hanging for so long! My laptop has been on the fritz so it hasn’t been easy working on the blog from home, and I’ve been really busy at my 9-to-5, too, so I haven’t been able to sneak in much Urban Nesting time in the office.

Plus, it turned out not to be just a new rug, of course, so I needed a bit more time…

So here goes! This was the living room before, right after it was painted:

DSC00753

During the rug back-and-forth…

DSC00909And finally, now!

DSC01014

Thank you to everyone who chimed in on the rug choices! Your advice was much appreciated because it was no easy decision. As you can see, I ended up going with rug No. 3! I really wanted No. 7, but I couldn’t justify the cost when the bf has a cat that barfs just about every day… Gross.

DSC01052

I’ll post a “Shop This Space” next week because I have new curtains now, too! That round tray on the coffee table was a thrift store score, but its paint job is a bit of a work in progress. More on that later.

DSC01044

I’m absolutely smittten with the calm, cool vibe of the space, and I think the mood of the room will really be swayed by artwork. It’s still pretty bare in there right now. The three “prints” above the couch now are just drawings I made and threw up there so it didn’t look so bare at the Garden Party. I’m planning to replace them eventually, but art isn’t something I like to just buy to fill space—it’s expensive, so I want to love it with a capital L!

DSC01036So what to do you think about how the space is coming together? I hope you like it as much as I do—but I’m always open to suggestions!

Before and After: Living Room

I didn’t want to show off the living room until it’s in a more complete state, but the people have spoken… and they want to see pictures ASAP. So here’s what it looked like before I moved in:

livingroomOrange. Woof.

My original plan was to paint the entire living room Whispering Spring (which is now in the dining room). But since it’s such a large room with a nice high ceiling, I decided to go with something more dramatic and on just one wall (well, a wall and the tiny sliver of wall that separates the two rooms).

I landed on Hale Navy from Benjamin Moore. (Again, for those of you interested, I used the Ben series with an Eggshell finish, and it was about $40/gallon in Chicago.)

Hale NavySo before last weekend, this is what the living room looked like:

IMG_0908And for a little while it looked like this…

But now we’re here!DSC00753I am in LOVE with the color! (The landlords probably aren’t as thrilled…) It only took two coats to cover the white. I am definitely on board with buying more expensive, higher quality paint—in this case, you get what you pay for.

DSC00755I like the pink rug with the charcoal couch (it reminds me of this), but it doesn’t really fit with my vision for the living/dining space. Plus, it really clashes with my red Coca-Cola cooler that looks so fab against the navy. So I’m thinking about going for something lighter since the wall, couch and TV console are all dark colors. Those of you with experience: Is having a white or cream shag or flokati rug a terrible idea?

DSC00754Other things on the wish list: curtains, colorful throw pillows, wall art, new tray for the coffee table (that oval shape is just not working for me—perhaps a DIY RIBBA one?).

DSC00757Stay tuned and you can help me decide what’s next for the space. Leave me a comment if you have suggestions!

Before and After: Dining Room

I’d just like to start this post off with a friendly reminder of what the dining room looked like before I moved in…

diningroomGah, the horror! Who on Earth thought that was a good idea?! Sorry, I should have warned you like they do before they show something disturbing on the news. Luckily, the management company painted it white—though it was a terrible, cheap, chalky white, which was definitely one of the reasons I was eager to change it.

I started gathering inspiration and tested a few sample colors and landed on Benjamin Moore’s Whispering Spring. (For those of you interested, I used the Ben series with an Eggshell finish, and it was about $40/gallon in Chicago.)

Screen Shot 2014-04-22 at 6.23.42 PMWell, actually, I thought I was putting Whispering Spring in the living room, but then I decided to paint the dining room too. (Living room reveal coming soon!) So before this weekend, my dining room looked like this:

IMG_1652Certainly an improvement over the Flubber green, but nothing great. And now…

DSC00741Ta-da! I love it! It’s subtle and fresh and a little bit preppy. I really like the way the walls match—but don’t match—the inside of the pendant light.

DSC00734I figured I might as well wipe down the blinds and polish the floors since the room was nearly empty, but damn, it’s amazing how long it takes to get a room put back together after painting when you factor in deep cleaning. Oh well, it desperately needed it, and in my mind, it adds to the delightful new color!

There’s still a ton to do, like hang artwork (no, that taped-up newspaper isn’t staying), re-stain the table (don’t even ask how that happened…) and buy curtains, but we’d need a lot longer than a three-day weekend to get all that accomplished. Stay tuned for more updates!

Weekend Sneak Peek: Moore To Come

I honestly think I’m going to have a hard time sleeping tonight. It’s not that I’m excited about Good Friday or the Easter Bunny’s visit (though that candy aisle at Target was harrrrd to walk past today)…

DSC00672

Me and BM are about to become good pals.

No, I’m finally taking the leap and painting! The original plan was to paint the living room, but now I’ve decided to paint the dining room and one wall in the living room. The landlord’s approved, the paint’s been bought, the holes have been patched and the ladder is on it’s way (thanks, dad!). There’s no turning back now…

Ah, naked walls!

Ah, naked walls!

Curious what colors I went with? Well, the dining room is going to be one of the colors I tested a couple weeks ago, and the living room will very soon have a dark accent wall. That’s all you can know for now : )

There’s so much to do, but hopefully I’ll have a great Before and After to show you early next week. Wish me luck! xoxo

Image

Before and After: Redecorated Kitchen

Rental kitchens are such a drag. Seriously. I mean if you can afford a place with stainless steel and granite as far as the eye can see, then good for you. But the rest of us are stuck with hideous faux maple cabinets and barely-working stoves.

DSC00443

Look familiar? I’m not the only one with problem. I could paint, but it seems like a real pain to tape off a bunch of cabinets and appliances, so I decided to work with what I had.

DSC00445

First thing I did was change out the lightbulbs. Even if they weren’t burned out, I swapped them out for a higher wattage (as bright as the fixture would allow). In rentals, lightbulbs are usually replaced (either by the management company or previous tenants) with whatever is on hand, so oftentimes you’re not getting as much light out of a fixture as you can. It may not seem like it in these pics, but it made a huge different for me, especially by the sink.

DSC00572

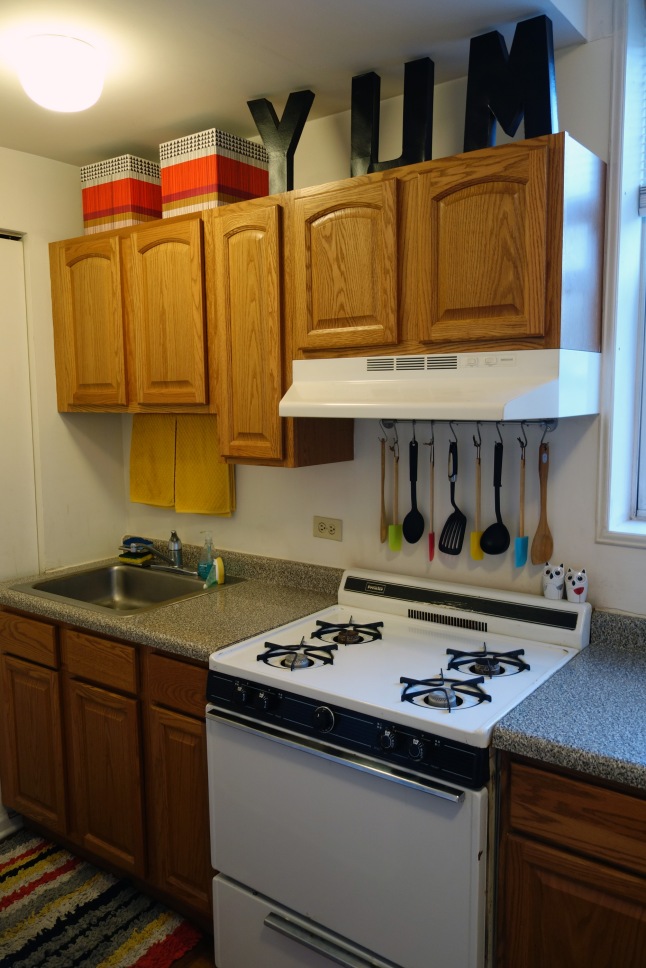
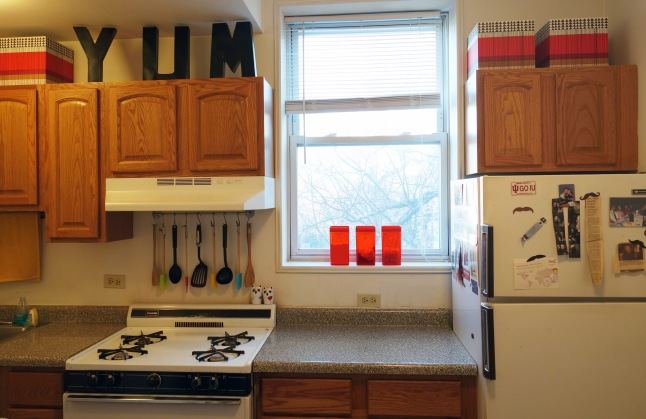
Second, I took a look to see if I was missing out on any storage opportunities. Outside of the pantry, what you see is what I’ve got… so cabinet space is at a premium. I realized there was space above the cabinets that wasn’t being utilized so I set about finding a solution that was both decorative and functional. There’s loads of baskets out there, but it had to fit the width of the cabinet so that was the real challenge. I happened across these funky laminated cardboard boxes at IKEA, and they were a perfect fit.DSC00584

One of the things that annoys me most about my kitchen is that the oven is so old it’s handle doesn’t have an opening to hang towels from. But the oven isn’t really where you need towels anyway—the sink is. So since there was a big empty spot above the sink, I hung a Bygel rack to hang colorful kitchen towels from. I figure I can switch them out with different towels depending on my mood, the holiday, laundry day, etc. I hung another Bygel rack above the stove to hang utensils from. So handy! Plus, it reduces the clutter of a utensil holder from the counter space.

DSC00594

And finally, I decided to have some fun. You’ve all seen people with EAT signs in the their kitchens; it’s been done 1,000 times. So I decided to do YUM because, well, why not? I bought the paper mache letters from Jo-Ann Fabrics, and spray painted them black.  It was super quick and easy.

The “new” kitchen isn’t great by any means—that’d take a lot more than a few boxes and some spray paint—but it’s certainly more fun. I’m still working on the other walls of the kitchen (the pantry majorly needs to be reorganized and it’d be great to find a butcher block/microwave stand all in one). I do have some vintage aprons in one spot, though I need to figure out a less hideous way to hang them. Perhaps another update to follow…

DSC00601